Hello friend!
I hope you’re staying safe and have started to settle into somewhat of a routine. My routine looks pretty different from when I was working, but I’ve settled into a rhythm that seems to be working well for the time being. I’ve started teaching a livestream yin yoga class on Tuesday nights, which can be a great way to help soothe your nervous system and find a little oasis of calm in your week. Feel free to join us for a little community connection and a lot of chillaxation.
It’s so important to take care of your mental health at this time and finding your way to do so is incredibly personal. I’ve found meditation, a daily walk, Obe fitness, lots of baths, daily yoga (even 5 minutes makes a big difference for me!), connecting with friends and family on Zoom (but don’t feel pressured to go to every since online ‘party’ you get invited to!), and of course cooking and eating delicious things to be so helpful in keeping my brain and body healthy and happy.
I’d been wanting to bake something for quite a while and had decided on these cookies as my first project. But then I looked into my fruit bowl and saw the saddest pile of apples ever. So I figured why not get creative and try making something I’ve never done before.
I’ve experimented with a few different pie crusts in the past, like this one for my Blueberry Rhubarb Pie and my Saskatoon Berry & Cherry Pie, but those crusts were like the nutritionist’s version made with nuts and seeds that are delicious, but not quite the same as a regular pie crust, ya know?
So I went to my pantry and looked around at what I had and decided to play with some of my favourite grain-free flours to come up with a crust that is easy to work with, crisp, and holds up when you slice it! Feel free to get creative with your fillings and make this pie your own. If you have any candied ginger sitting around in your pantry, cutting up a tablespoon or so and throwing that into the pie could be a game-changer!
Anyway, here’s the recipe! I hope that playing around in your kitchen brings you a little joy and comfort!

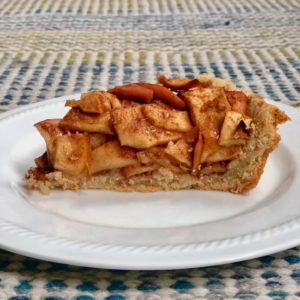
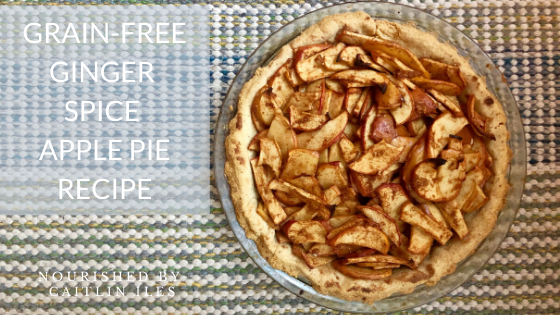
This paleo-friendly pie recipe has a delicious crispy crust made with almond flour and is full of apples, spices, & a hint of maple syrup to make all your pie dreams come true.
- 1 tsp. coconut oil to grease the pie pan
- 1 cup finely ground almond flour
- 2/3 cup tapioca flour
- 1/3 cup cassava flour *can sub for 2 heaping tbsp. coconut flour*
- 1/2 tsp. sea salt
- 1 tsp. coconut palm sugar
- 1/2 cup butter use coconut oil for dairy free
- 1 egg
- 6 medium apples
- 1 inch ginger grated
- 1/2 lemon juiced
- 1/4 cup maple syrup
- 1/2 tsp. sea salt
- 1.5 tsp. cinnamon
- 1 tsp. vanilla
- 2 tsp. tapioca flour/starch
- 1 tbsp. butter or coconut oil optional
-
Preheat oven to 375F and grease a 9 inch pie pan with the 1 tsp. of coconut oil. If you have extra just throw it in the pie crust.
-
Add all pie crust ingredients to the food processor EXCEPT for butter and egg.
-
Cut the butter into small cubes and add to food processor. Pulse until you achieve a coarse crumb-like texture.
-
Break the egg into the food processor and process until a dough forms. It will be very obvious when it turns from crumbs to a dough.
-
Remove the dough from the food processor and work into a ball.
-
You have two options here: You can flatten the ball into a disk, place it between two pieces of parchment and roll it out into a large circle. Or you can be lazy like me and flatten the ball, then press it into your pie plate.
-
Once the dough is in the pie plate you may want to crimp the edges. Then pierce the crust all over with a fork, including the sides to prevent it from puffing up while it bakes. If you'd like, you can cover it with parchment paper and pour beans in to keep it flattened.
-
Place the pie crust in the oven and make for 10-12 minutes. You want it to start looking set and ever so slightly browned. When done remove from oven and set aside.
-
While pie crust is baking you can either use a mandolin and thinly slice you apples (that's what I did) or you can cut them into cubes. This all comes down to personal preference.
-
Add the apple, ginger, lemon, maple syrup, sea salt, cinnamon, vanilla, and tapioca starch/flour to a bowl and stir it together.
-
Press the filling into the pie crust. If you'd like you can break the tbsp. of butter/coconut oil into little pieces and sprinkle it over the top of the apples for some extra deliciousness.
-
Place in the oven and bake for 45 minutes for slightly al dente apples or 60 minutes for a softer filling. If you find the top of the apples start to brown more than you'd like you can tent a little tinfoil over the top of your pie.
-
Remove from the oven and allow to cool for 15-20 minutes. It's important to let the pie cool so the crust can set. Gluten free is a little more finicky than regular crust!
-
Top with your favourite pie toppings (whipped cream, ice cream, etc.) and enjoy!
Well friend, that’s my recipe for today! I hope you enjoy it. And remember, if you need any extra support to help you feel strong and healthy, make sure you download my FREE Anti-Inflammatory Meal Plan & Shopping List right here!
As always, thank you for your love and support. Please stay safe and take care of one another!
Cait xo


I made it today with a gelatin egg (there is no egg in the ingredients, but there’s in the instructions btw). Everyone loved it – the crust was crispy, no sogginess from the apples, fruity with just enough sweetness. Definitely a keeper. Thanks so much for the recipe!
Hi Olga,
I’m so glad you enjoyed the pie!! Could you share with me how you make a gelatin egg? I’ve never done that before, but it sounds great. I also updated the recipe with the egg in the ingredients. I thought I had done that last week, but I didn’t save it. Oops! Thank you so much for pointing it out!
For the gelatin egg, place 1TB water in a bowl, sprinkle 1 TB of gelatin on top and wait for about 10 sec for the gelatin to get wet. Add 2TB very hot (but not boiling) water and vigorously whisk into a thick paste. Use within 2-3 minutes in whatever you’re making, otherwise it will solidify too much. Thanks again, Caitlin!
That is amazing!! Thank you for sharing 😀