Hello friend!
Well another week down means another recipe for something baked and delicious because that seems to be the extent of my recipe creativity lately. Considering I’ve eaten chickpea risotto in some form every day for lunch for the last few weeks (it’s a great vehicle for lots of different veggies and flavours and the chickpeas are packed with protein and fibre), I should probably start upping my creativity a bit in that regard. But until I feel motivated enough to do so you’re just going to have to enjoy all the comfort baking I’ve been doing 😉
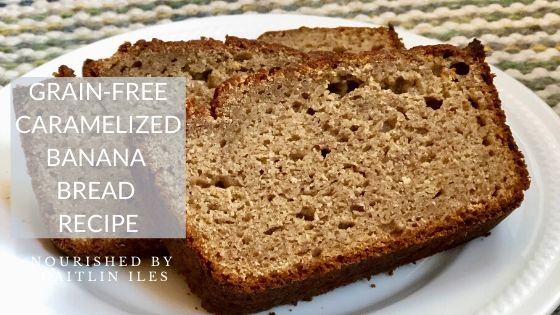
This week’s recipe is a grain-free spin on a regular banana bread. I have been gluten-free since 2011 and don’t generally eat tons of grains in my day-to-day life by virtue of me being incredibly carbohydrate sensitive. I can look at a bowl of rice and throw my blood sugar out of whack, so when I’m home I focus on a more Paleo-style of eating to support my personal gut health.
That means I tend to use grain free flours in most of my baking. Some of my favourites are almond flour, cassava flour, tapioca starch/flour, and coconut flour.
Coconut flour is quite high in fibre and so can be a very dense option to cook with. I always blend my coconut flour with tapioca to help make the texture lighter and to help bind everything together. You cannot use coconut flour one-to-one in any recipe because it absorbs so much liquid that you will end up with an inedible hockey puck. My general ratio when emulating regular flour with it is 1/4-1/3 cup coconut flour to 3/4-2/3 cups tapioca starch.
I use tapioca starch/flour in all of my baked goods (you could sub arrowroot or potato starches/flours equally in any recipe where I call for tapioca starch/flour) as it functions as an excellent binding agent. When we aren’t using gluten-containing grains we lose some of the elasticity and binding found inherently in those grains so subbing in a starch of some kind helps us emulate that structure more effectively.
Almond flour is a new favourite of mine in the last year or so ever since I found it in bulk at Costco. It gives a great texture and structure to baked goods, but again it is missing the element that helps it bind in the same way as gluten-containing grains. This is when I add a starch (tapioca, arrowroot, or potato) to help with the structure. The ratio is quite a bit different than with coconut flour because it isn’t nearly so drying. In this instance I will do about 3/4 cups almond flour and 1/4 cup tapioca (or other starch) per cup of regular flour.
Cassava flour actually comes from the same root as tapioca starch, but as opposed to being starch only, it is the whole root milled into a flour. It’s incredibly popular in South America and parts of Asia and Africa and comes from, you guessed it, the cassava root (also referred to as yuca or manioc). It’s similar to a yam, plantain, and potato in terms of starchiness and can be used in lots of recipes in a 1:1 ratio. I haven’t experimented with it much since I’ve only recently been able to find it in my city, but I still tend to combine it with almond flour to up the nutrient density of my treats. In this case I added 1/4 cup to the recipe more as an experiment to see what the texture was like and I really enjoyed it. If you don’t have it, sub in 2 tbsp. tapioca starch and 2 tbsp. almond flour.
Alright, I’ll be writing up a post in more detail on some other gluten-free flours soon, but this is a little primer on grain-free baking to get you started. Enjoy!
- 4 bananas the riper the better!
- 1 tbsp. organic butter, ghee, or coconut oil
- 1 tbsp. maple syrup
- 1 tbsp. vanilla
- 1/4 cup avocado oil
- 1 tsp. lemon juice
- 2 eggs
- 1 tbsp. maple syrup
- 1 cup almond flour
- 1/2 cup tapioca flour
- 1/4 cup cassava flour
- 1/4 cup coconut flour
- 2 tsp. cinnamon
- 1/4 tsp. sea salt
- 2 tsp. baking powder
- 1.5 tsp. coconut palm sugar
-
Preheat oven to 360F and line a bread tin with coconut oil. Set aside. If you want to skip the caramelization steps move to step 7.
-
Preheat a large frying pan over medium heat.
-
Slice bananas into small rounds.
-
Add butter to frying pan and allow it to melt and slightly bubble.
-
Add bananas in a single layer to the pan with a flat side down. Let them caramelize on one side until bottom is browned. Check after 2 minutes and keep checking every minute or so until bottom is a medium brown.
-
Flip the bananas (don't worry about getting them all perfectly flipped) and add first tablespoon of maple syrup. Stir together and allow to simmer. The bananas will start to break down and get mushy.
-
Remove from heat after 2 minutes and pour into food processor to cool.
-
While bananas are cooling combine all dry ingredients in a mixing bowl and stir together until fully combined. You can feel free to add some extra spices such as ginger, nutmeg, etc. if you like, I just prefer a plainer spice blend for my banana bread.
-
Set dry ingredients aside and add remaining wet ingredients to food processor (vanilla, avocado oil, eggs, lemon juice, and remaining maple syrup).
-
Stir wet ingredients into dry ingredients until there are no clumps of flour then pour into bread pan. Cover with coconut palm sugar and place in the oven.
-
Bake for 60 minutes and check centre with a skewer. If it comes out clean removed from the oven, otherwise cook another 5-10 minutes.
-
Set on counter to cool in the pan for 5-10 minutes then move to a cooling rack. Gluten-free baking continues to develop it's structure while it cools so try to resist cutting in right away.
-
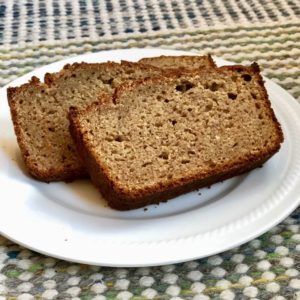
Slather with organic butter, ghee, or coconut oil and enjoy!
I find the loaf tastes best the next day after being stored in the bread pan and covered with a beeswax food wrap.
Well friend, that’s my recipe for today! I hope you enjoy it. And remember, if you need any extra support to help you feel strong and healthy, you can download my FREE Anti-Inflammatory Meal Plan & Shopping List right here!
As always, thank you for your love and support. Please stay safe and take care of one another!
Cait xo


Hey Caitlin, the banana bread looks good. Are there eggs in the ingredients? They’re mentioned in step #9. Thanks.
Yes there is! 2 eggs 😀 I just added them to the instructions. I don’t know how I keep missing those eggs haha